Follow the steps below to connect a domain purchased through GoDaddy to your website.
Log in to your GoDaddy account.
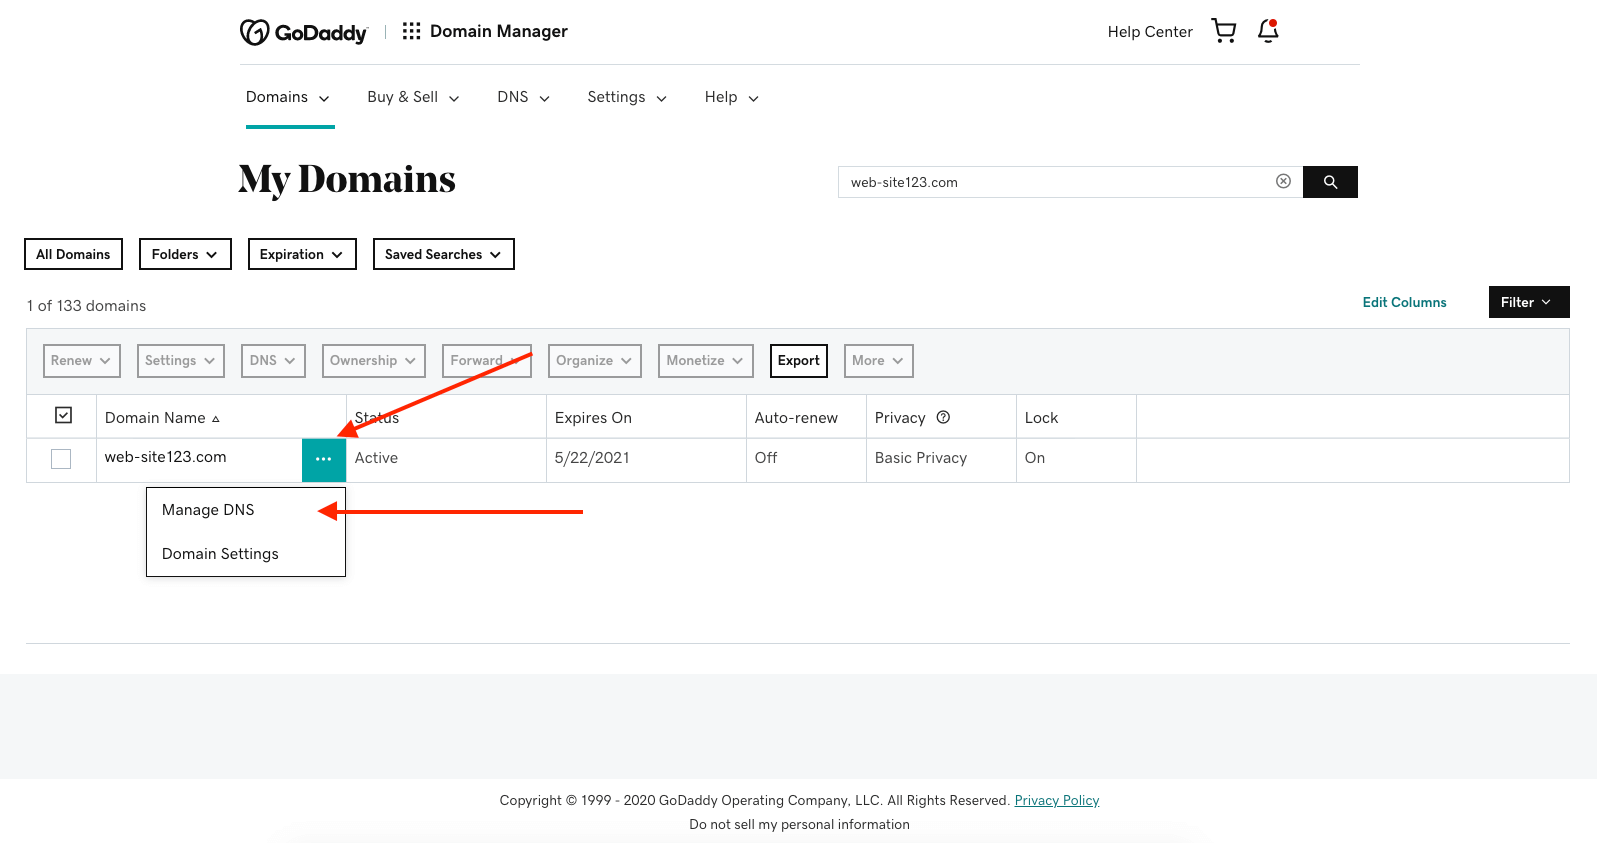
Go to My Products and find the domain you want to connect.
Click the three dots (⋯) next to the domain.
Select Manage DNS.
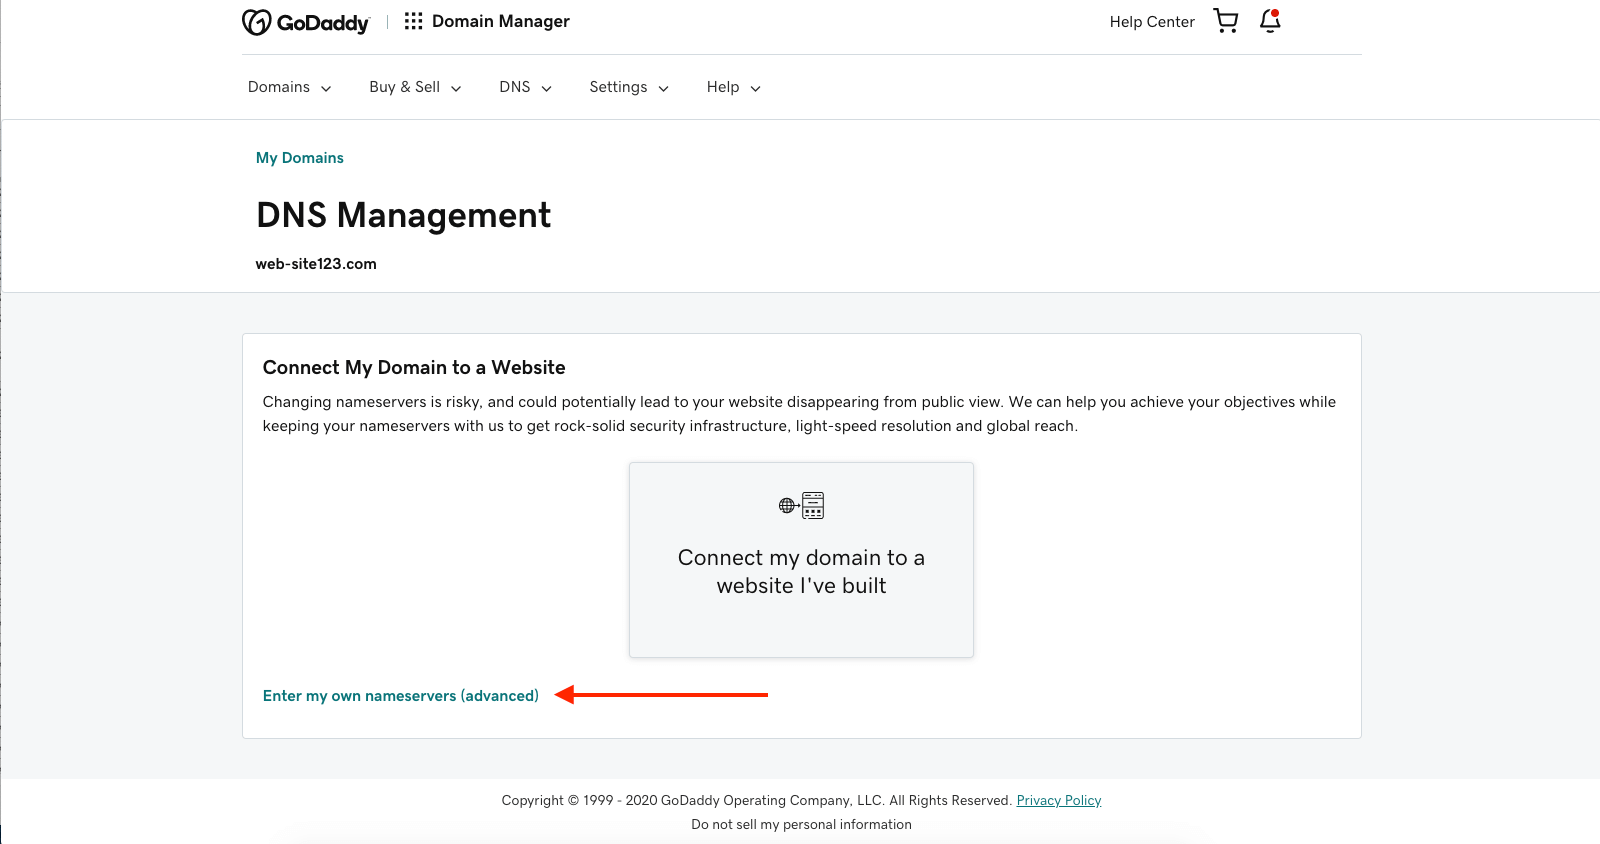
This will open the DNS Management panel.
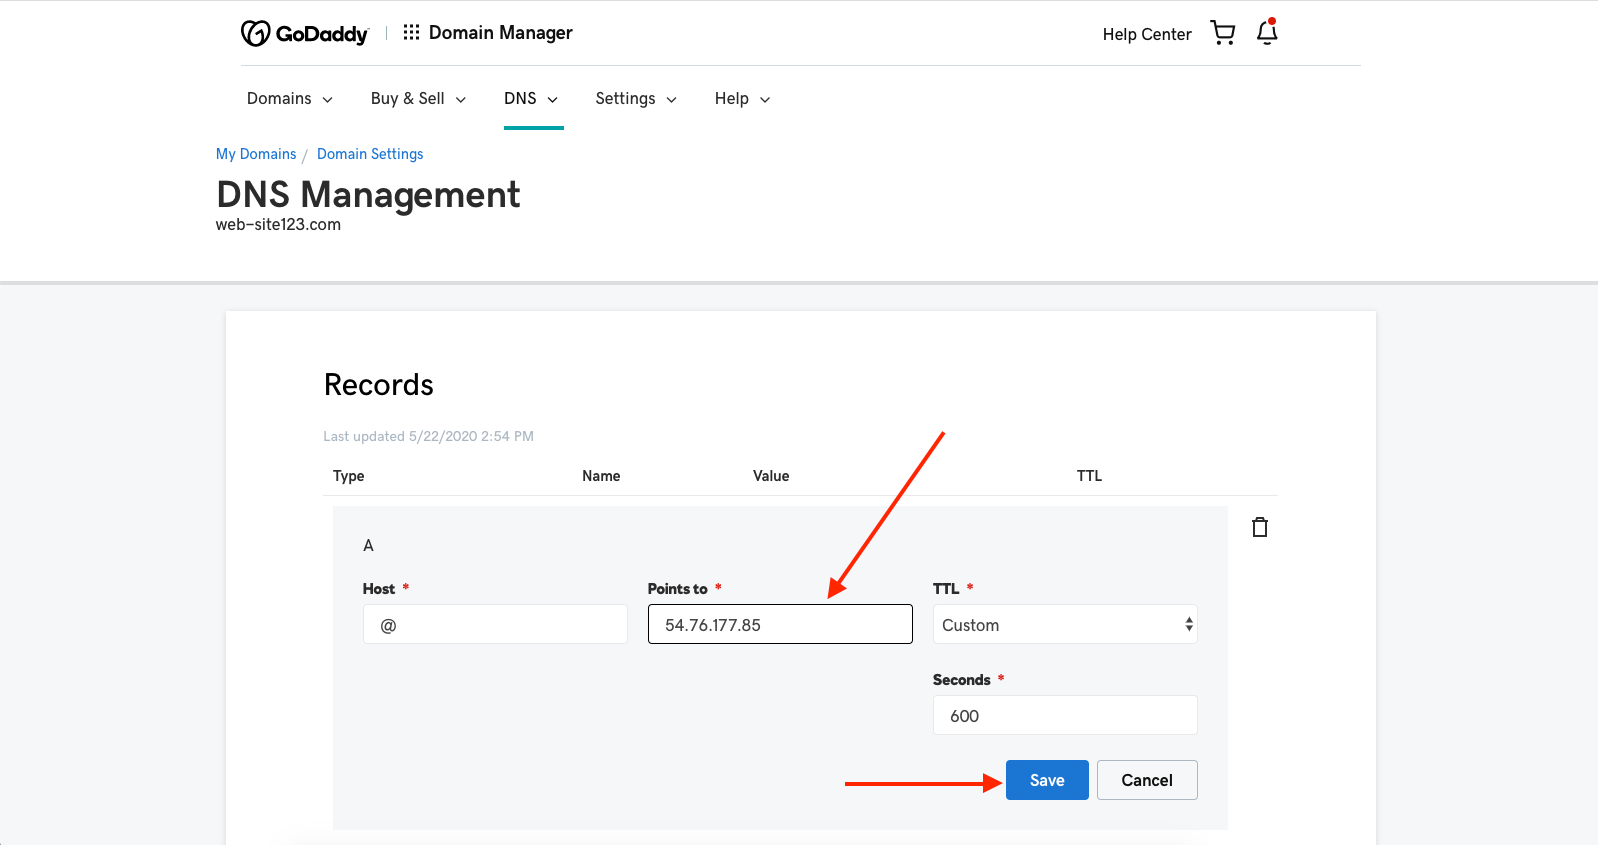
The A record connects your domain to your website’s server.
In the DNS Management panel, locate the A Record section.
Click the pencil (Edit) icon.

Enter the following values:
Host: @
Points to: 166.117.120.15
Save your changes.
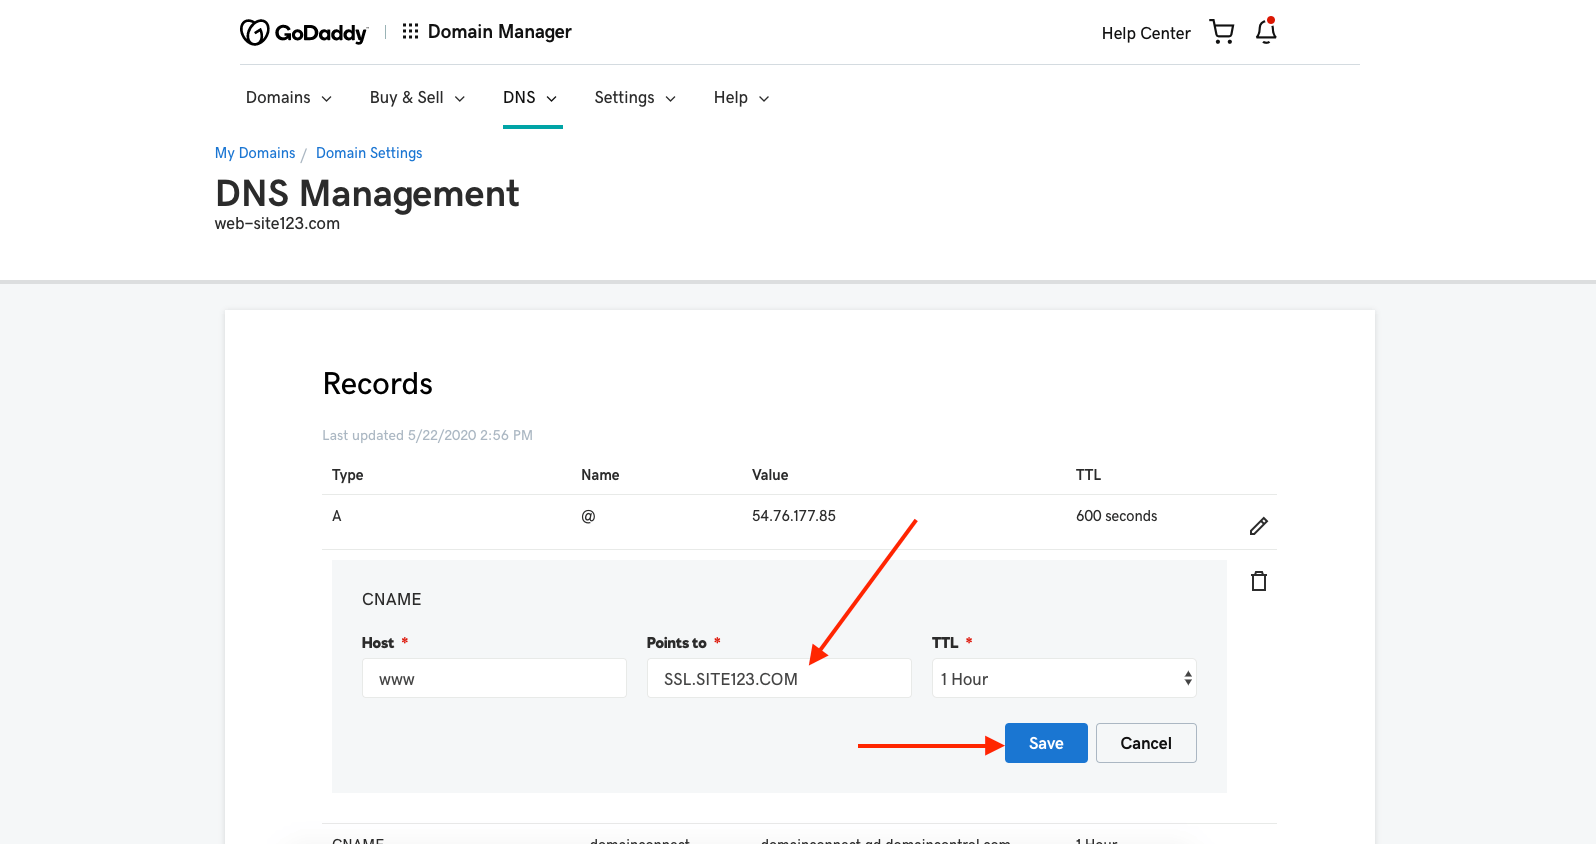
The CNAME record connects the www version of your domain.
Return to the DNS Management panel.
Find the CNAME Record section.
Click the pencil (Edit) icon.
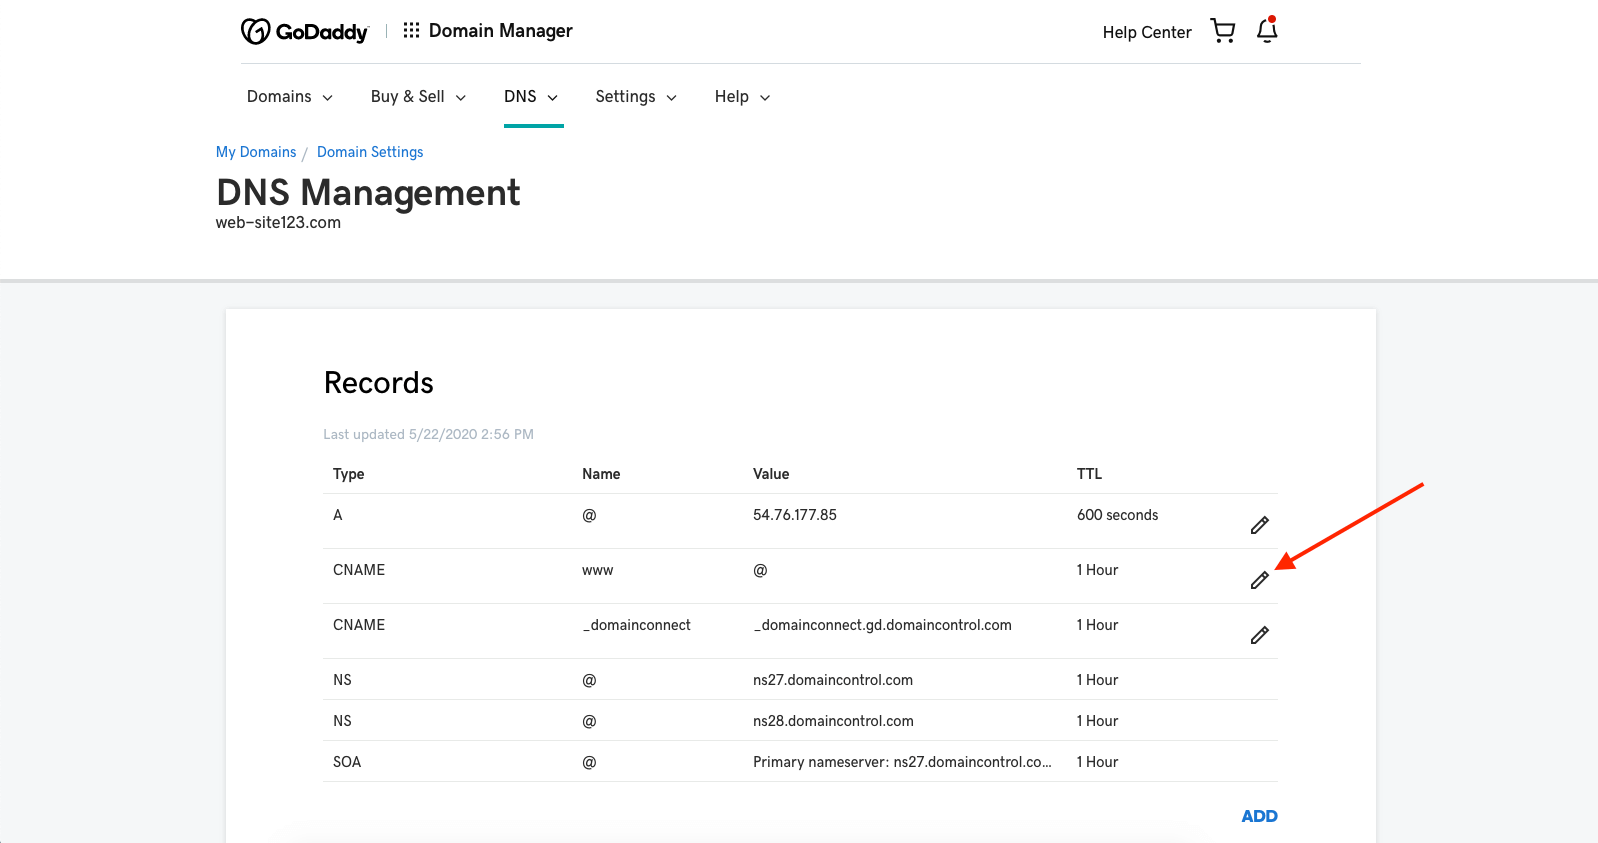
Enter the following values:
Host: www
Points to: global.loadweb.com
Save your changes.
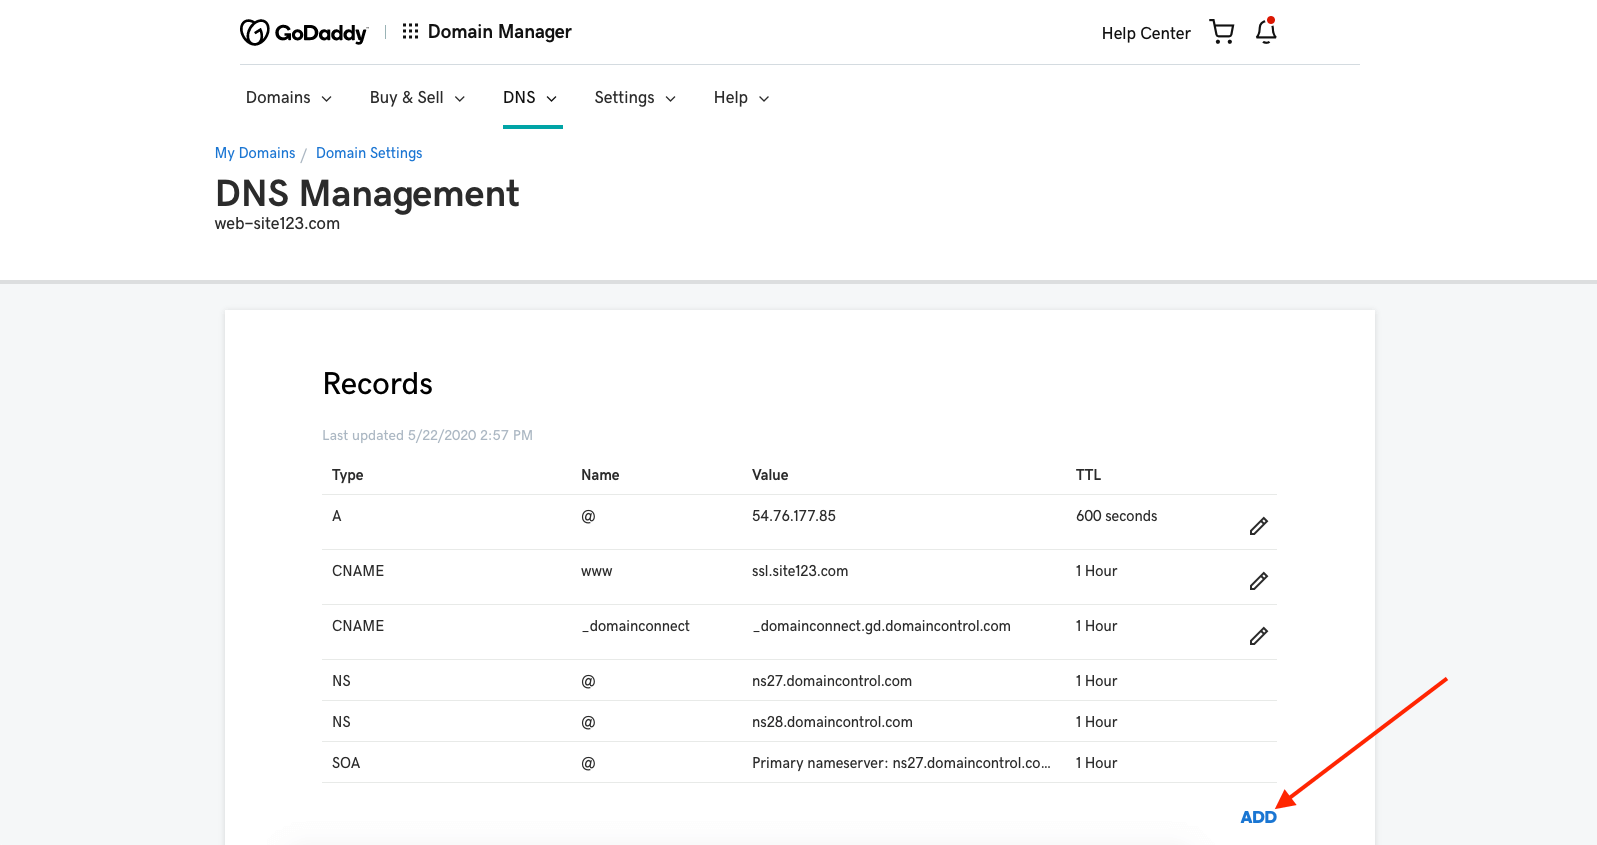
If you would like to use email accounts created with us, you will need to add MX records.
In the DNS Management panel, go to the MX Records section.
Click Add.
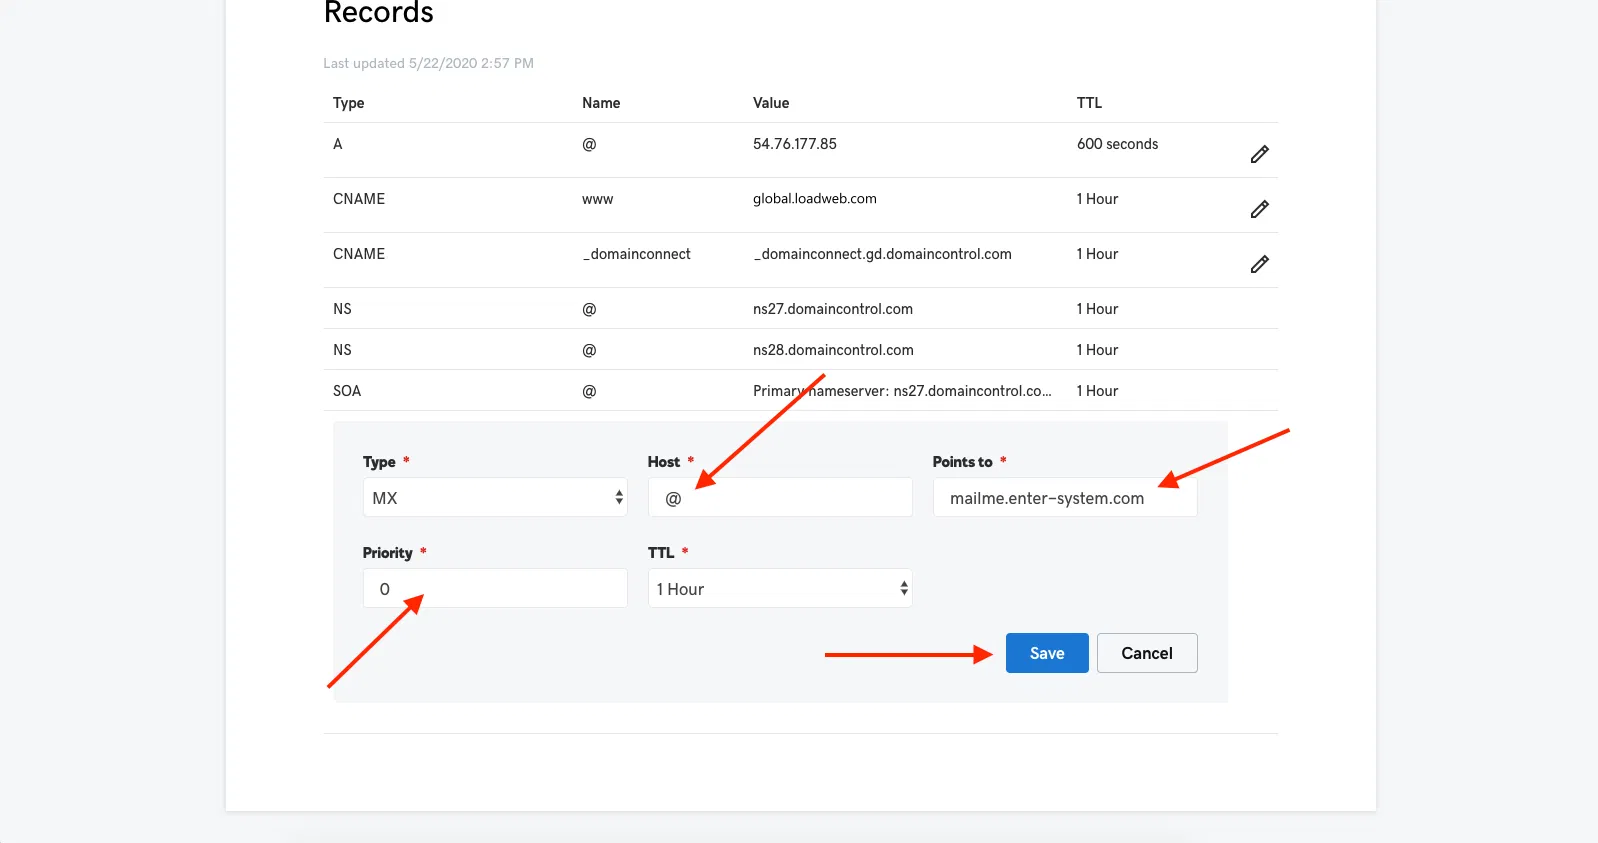
Add the following records:
Host: @
Points to: mailme.enter-system.com
Priority: 0
Host: @
Points to: mailme.enter-system.com
Priority: 10
Host: @
Points to: mailme-backup.enter-system.com
Priority: 20
Save each record after adding it.
Note: Nameservers change can take up to 72 hours to update. Completing these steps will connect your domain with your website and allow you to use our email accounts. However, the domain DNS management will remain with GoDaddy.
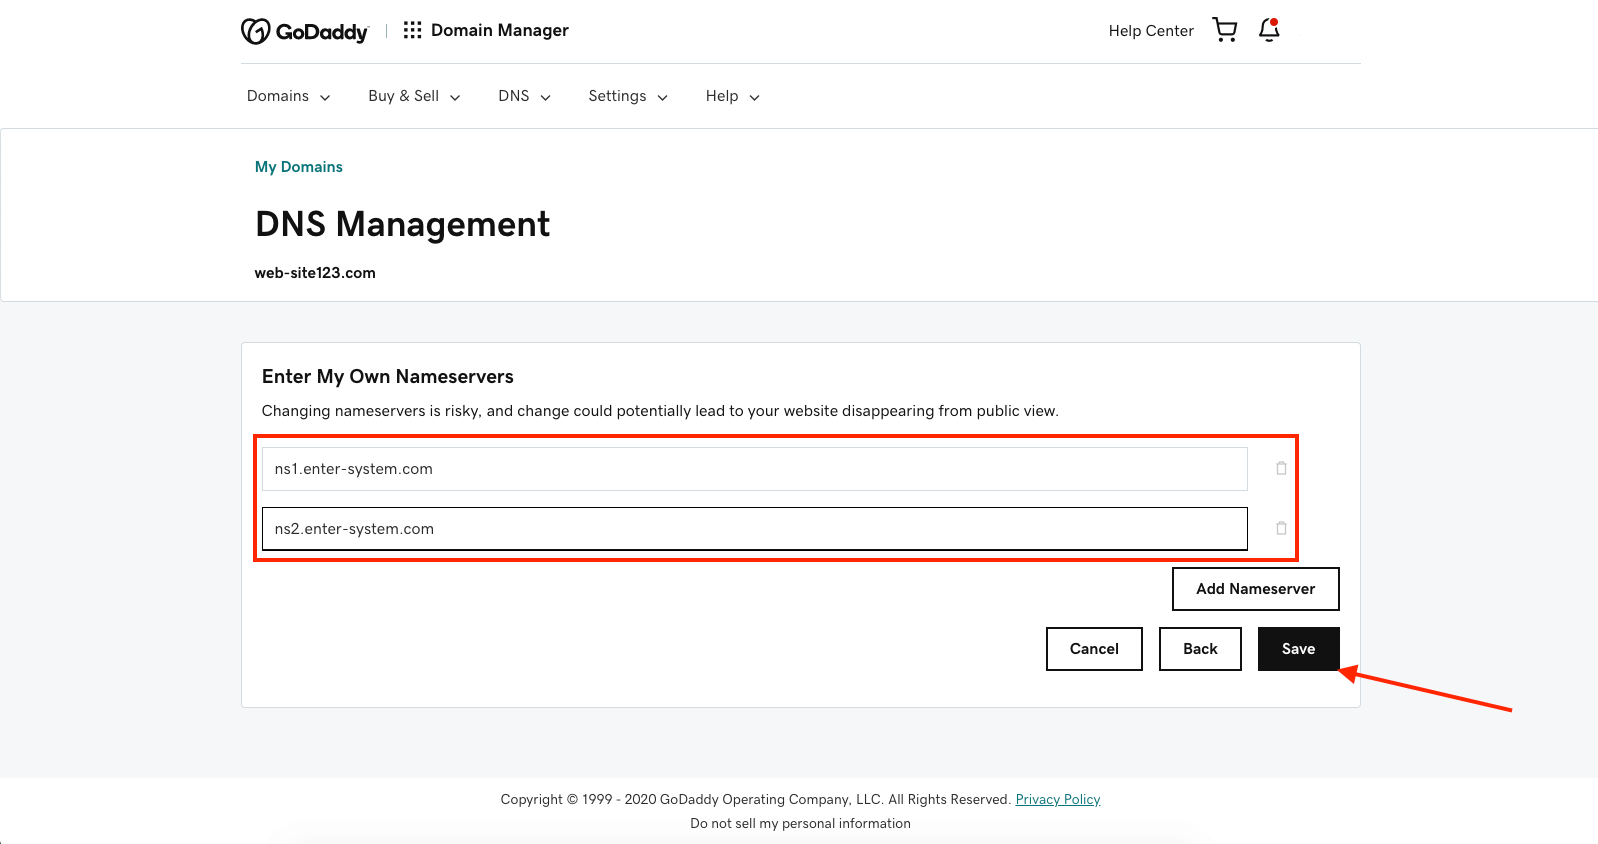
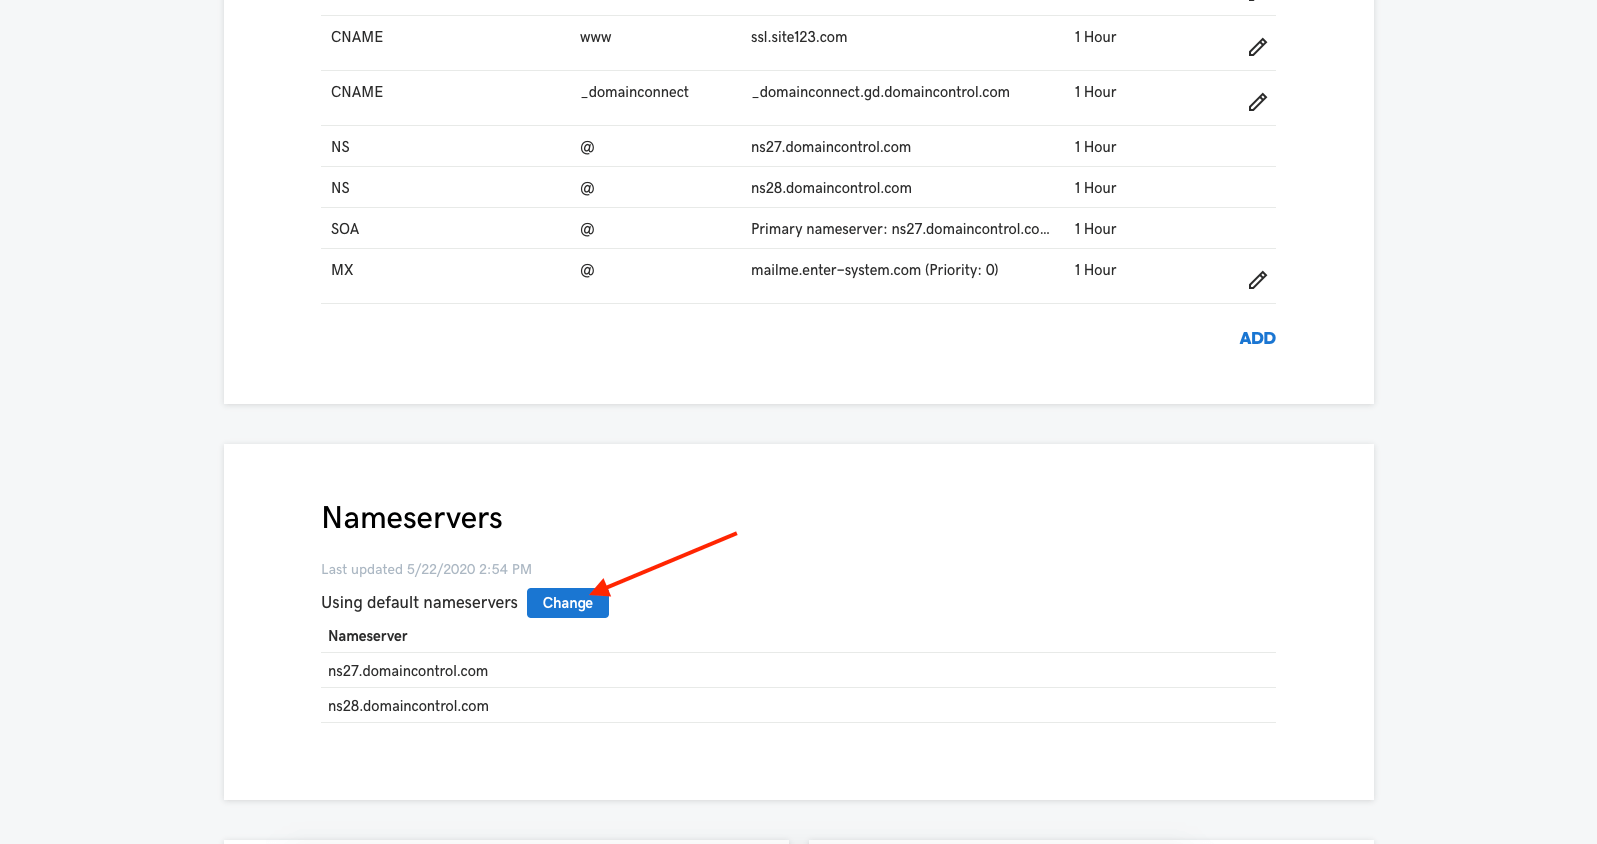
If you prefer to forward full DNS management to your website, you can update the nameservers.
In the DNS Management panel, scroll down to Nameservers.
Click Change.
3. Select Enter my own nameservers.
Enter these nameservers:
ns1.enter-system.com
ns2.enter-system.com
Save your changes.